Lume 3.3.0 - Castelao
by Óscar Otero
10 min read
A new Lume version was released, and it's dedicated to Castelao, probably the most important figure in Galician culture in the 20th century.
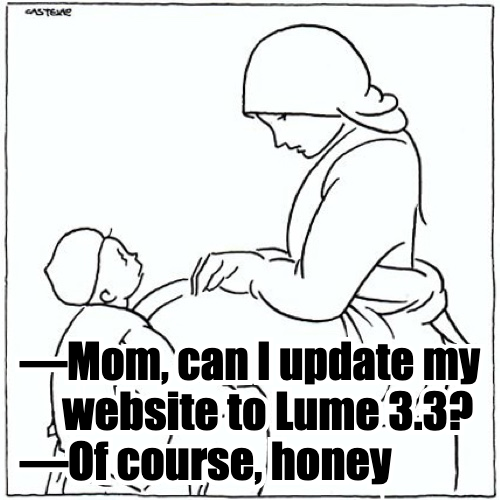
Castelao studied to be a doctor but, as he said once: "I became a doctor for the love of my father; I don't practice for the love of humanity". He is better known as a politician, writer, painter, caricaturist and many other things. As a caricaturist, one of his best-known works is "Cousas da vida" (Things in life), a collection of drawings published in different newspapers denouncing the caciquism and suffering of the rural people of Galicia with a humorous eye. Seven years ago, I created "Memes da vida", a meme creator using some of his drawings, that you can try here.
Deno changes
Lume 3.3.0 drops support for versions of Deno older than 2.9.0, because it uses some new features (like HMR) that are not supported in older versions.
Since Deno revived the LTS channel with the 2.9.0 version, it looks fine for Lume to guarantee support for LTS.
Another important change is that the deno.land/x registry is now read-only, which means that it's not possible to publish new versions of Lume there. If you're still importing Lume from this domain, please update it to JsDelivr.
Lume is on Codeberg
Codeberg is a more ethical alternative to GitHub, managed by a non-profit association based in Berlin, Germany. For some time now, Lume is available on both Codeberg and GitHub. If you want to star, create a PR, or open issues, you can do it on either GitHub or Codeberg. The code on both platforms is synced: any commit to the GitHub repo is automatically updated on Codeberg and vice versa.
Having the code available on multiple providers gives users more choices and makes Lume more independent since it doesn't rely on a single platform.
HMR in ES modules
ES modules are immutable by design. This means that when you import a module
like import foo from "./bar.ts", the code of bar.ts is cached forever, and
the only way to reload it is restarting the process.
Lume bypasses this limitation in --serve or --watch mode by adding a hash at
the end of the files. For example, when Lume loads the file _data.ts, it's
loaded as _data.ts#123456, so when the file changes, it's loaded again with a
different hash.
But this workaround only works for files loaded directly by
Lume. If the _data.ts file has a nested import (for example,
import foo from "./bar.ts"), this file isn't loaded by Lume, so it can't add
the hash, and it can't be reloaded after a change.
Fortunately, Deno 2.9.0 implemented the
module hook API of Node.js.
This API allows you to configure how Deno resolves and loads modules, and Lume uses it to add the hash to all local modules loaded by Deno. This
means that any module loaded from your src folder will be reloaded automatically when it's updated, no matter how it is imported.
// If bar.ts changes, it's reloaded in Lume 3.3.0!
import foo from "./bar.ts";
Thanks to this, it's now possible to import and use JSX components without using
the comp variable:
// If button.tsx changes, it's reloaded in Lume 3.3.0!
import Button from "./_components/button.tsx";

export default function () {
  return <Button>Click here</Button>;
}
Note that this is just an example; the comp variable is still the best way to
use Lume components.
New plugin pwa
Progressive web apps
allow you to convert websites to apps installable in your operating system. This
plugin makes the job of creating a PWA easier, generating the manifest.json
file and the minimal icons required by all platforms.
To use it, just create the app variable in the page that you want to use as
the entry point (typically the homepage). Let's see an example.
---
title: E.T. the videogame
description: Webapp with everything about the best videogame created
tags:
  - video-game
  - atari
  - guides
metas:
  color: "#cc104a"
app:
  name: =title
  short_name: "E.T."
  description: =description
  color: =metas.color
  categories: =tags
  icon: favicon.svg
---

E.T. meets Elliott in a field of wells.
As you can see, it's possible to use aliases to other variables (i.e. app.name
is an alias to title). The plugin will generate the manifest file and the
icons in different sizes using the favicon.svg file as the input image.
PWA can have shortcuts (additional pages shown in a submenu). Use the shortcut
variable in other pages to add shortcuts to your application:
---
title: How to play
description: Tricks and guides to play.

shortcut:
  name: =title
  description: =description
---

E.T. is an adventure game in which players control the alien E.T.
from a top-down perspective.
See the plugin documentation on lume.land for more details.
New plugin well_known
This plugin makes it easier to generate some
.well_known URLs. Since Lume
is a static page generator, this plugin is limited to the specs that can be
implemented statically and doesn't require dynamic server-side behaviours. In
this first version, the implemented standards are:
- atProto handle
- security.txt
- trust.txt
- webfinger, thanks to
Ege Celikci (it only supports a single fixed
subject, not dynamic
?resource=lookups) - gpc
- PWA origin migration
- matrix, thanks to Ege Celikci.
The plugin allows you to configure the data of all these standards from the
_config.ts file:
import lume from "lume/mod.ts";
import wellKnown from "lume/plugins/well_known.ts";

const site = lume();
site.use(wellKnown({
  gpc: {
    gpc: true,
  },
  atProto: "did:plc:lqbfqodxim3n27heuou7do3g",
  trust: {
    contact: "mailto:info@example.com",
    social: "https://mastodon.gal/@misteroom",
    dataTrainingAllowed: false,
  },
  migratePWA: "https://old-domain.com/pwa",
}));

export default site;
More details in the plugin documentation page.
New plugin toc
A common way to generate a table of contents in Lume is using a markdown-it plugin like the toc plugin. A drawback of this approach is that it only works for pages rendered with markdown-it. If you want to use the Remark plugin, you need a different plugin. And if you want to generate a table of contents from pages in other formats like Vento or JSX, it becomes more complex.
In this version, Lume added the new TOC plugin, which is agnostic of the template engine. It uses the DOM API to generate the TOC using the toc attribute:
<nav toc="content">
  <!-- toc will be generated here -->
</nav>

<div id="content">
  <h2>First title</h2>
  <h3>Subtitle</h3>
  <h2>Other title</h2>
</div>
As you can see in the example, the plugin only needs the toc attribute defined in the element that will contain the table of contents. The value of this attribute must be the ID of the element with the text. The plugin will automatically generate the following HTML code:
<nav toc="content">
  <ol>
    <li>
      <a href="#first-title">First title</a>
      <ol>
        <li><a href="#subtitle">Subtitle</a></li>
      </ol>
    </li>
    <li><a href="#other-title">Other title</a></li>
  </ol>
</nav>

<div id="content">
  <h2 id="first-title"><a href="#first-title">First title</a></h2>
  <h3 id="subtitle"><a href="#subtitle">Subtitle</a></h3>
  <h2 id="other-title"><a href="#other-title">Other title</a></h2>
</div>
Note that the plugin not only generates the table of contents, but also the ids of the headers (if needed) and the anchors. Use the anchor option to configure how these anchors are generated or disable this feature:
import lume from "lume/mod.ts";
import toc from "lume/plugins/toc.ts";

const site = lume();
site.use(toc({
  anchor: false, // disable the anchor generation
}));

export default site;
The no-toc attribute can be used to ignore some headers from being included in the table of contents:
<h2 no-toc>This header is omited</h2>
Go to lume.land for more info about this plugin.
New plugin git_date
In Lume, it's possible to use the value "Git last modified" to extract the date when a file was modified from the Git history.
---
title: Hello world
date: Git last modified
---
This works great but can make the build really slow for large sites because Lume
runs a git command for every file. The new plugin git_date makes this process
way faster because it only runs a single git command to return the modified date
for all files.
import lume from "lume/mod.ts";
import gitDate from "lume/plugins/git_date.ts";

const site = lume();
site.use(gitDate());

export default site;
By default, it modifies the date key, but you can specify a different
variable:
site.use(gitDate({
  varName: "lastModified",
}));
This makes the built-in feature obsolete, since the plugin is faster and better and goes in line with the Lume philosophy of keeping the core lean and moving the features to plugins.
More info in the plugin documentation page.
New plugin git_info
This plugin extracts some useful info from Git and saves it in the gitInfo
variable. This variable is an object with the following properties:
branch: The name of the current branchhash: The hash of the latest committag: If the latest commit is tagged, this variable contains the tag name; otherwise it'sundefined.
This info can be used in your templates for multiple purposes. For example, to show the latest version:
Version {{ gitInfo.tag || gitInfo.hash }}
Or to prevent caching issues:
<link rel="stylesheet" href="/styles.css?v={{ gitInfo.hash }}">
Improved archetypes
Lume archetypes got some improvements in this new version.
Named archetypes
Now it's possible to add new archetypes under a name from the _config.ts file,
using the site.archetype() function:
// Use a file path or URL
site.archetype("post", "_archetypes/post.ts");

// Use a function:
site.archetype("post", () => {
  const name = prompt("Name of the post");
  return {
    path: `/posts/${name}.md`,
    content: "Start typing...",
  };
});
Run deno task new post and the archetype is executed. This can be useful for
plugins or themes to register custom archetypes.
base option
By default, the paths of the generated files are relative to the src folder.
The new property base allows you to change the base path to "root" (the same
folder as the _config.ts and deno.json files).
Edit files
Now it's possible to edit an existing file by passing a function to the
content property. For example, to edit the deno.json file to add a new import:
export default function () {
  return {
    path: "deno.json",
    base: "root", // to save the file in the root directory instead of src
    content(json) {
      json.imports["new-import/"] = "https://example.com/";
      return json;
    },
  };
}
When running this archetype, the deno.json file is read, and the parsed JSON
is passed to the content function. If the file doesn't exist, the argument is
undefined.
Predefined archetypes
Lume provides the following archetypes out of the box:
deno task new plugin: Creates the boilerplate code for a custom plugin in the_pluginsfolderdeno task new archetype: Creates the boilerplate code for a custom archetype in the_archetypesfolder.deno task new cms: Creates the_cms.tsfile to use LumeCMS and updates thedeno.jsonfile to addlume/cms/to the import map.
New --inspect, -i flag
Now it's easier to debug Lume thanks to the --inspect flag. Run
deno task serve --inspect to start an
inspect server. Then,
you can open the chrome://inspect URL in any Chromium-based browser and add
breakpoints to debug your code.
Improved TypeScript
First: big thanks to Volpeon for the tireless work. In this version, Lume got some changes in how the types are managed.
Add your types
Lume has the Lume.Data type with the available data for all pages. In old versions, the way to add your types was to extend the interface:
interface Post extends Lume.Data {
  title: string;
  excerpt: string;
}
export default function (data: Post) { }
In this version, Lume.Data is no longer an interface, but a special type. The way to extend it is by passing the interface as a generic:
interface Post {
  title: string;
  excerpt: string;
}
export default function (data: Lume.Data<Post>) { }
Global types
If you want to apply the same types to all pages, you can extend the Lume.GlobalData interface in the _config.ts file:
// _config.ts

declare global {
  namespace Lume {
    export interface GlobalData {
      title: string;
      excerpt: string;
    }
  }
}
Now Lume.Data will have the title and excerpt types.
Types in processors
The functions site.process and site.preprocess accept an interface as a generic, which will be applied to all pages processed:
interface Post {
  title: string;
  excerpt: string;
}

site.process<Post>([".html"], (pages) => {
  for (const page of pages) {
    console.log(page.data.title);
    console.log(page.data.excerpt);
  }
});

interface CssFile {
  compress: boolean
}

site.process<CssFile>([".css"], (files) => {
  for (const file of files) {
    if (file.data.compress) {
      file.text = compress(file.text);
    }
  }
});
Strict types
By default, any undeclared property of Lume.Data has the any type:
export default (data: Lume.Data, filters: Lume.Helpers) => {
  data.foo // any
};
You can configure Lume to use strict types and apply unknown to properties not declared previously. Just add the strict: true property to the Lume.TypeConfig interface:
// _config.ts

declare global {
  namespace Lume {
    export interface TypeConfig {
      strict: true
    }
  }
}
export default (data: Lume.Data, filters: Lume.Helpers) => {
  data.foo // unknown
};
Improved Lume debugbar
The Lume debug bar got some improvements:
- The JS code is inlined in the HTML, instead of being loaded remotely from jsdelivr.
- It displays the RAM used, useful to detect the steps in the build that consume more memory.
- The button to edit the content in the CMS was moved to the tab bar, so it's visible even if the debugbar is collapsed.
See the CHANGELOG.md file for the complete list of changes.