Announcing LumeCMS
by Óscar Otero
5 min read
LumeCMS is a (yet another) CMS to manage site content. Despite its name, it can be used with any generator, not only Lume, thanks to its agnostic design. In this post, I want to dig into it and explain how it works.
Why another CMS?
There are plenty of CMS and site builders out there. However, I didn't find any CMS that meets my needs. Some of them are proprietary solutions, built for a specific technology (mostly React components), or only work for popular frameworks. Others are great but too expensive, or limiting.
The feeling of creating a website with a local server with live reload, where any change made in your code editor is automatically updated in the browser should be available also for non-developers. Some site builders allow to "design" the website with a WYSIWYG solution but at the cost of high vendor-locking. LumeCMS tries to find a solution where the CMS is completely agnostic, but at the same time, can connect with the generator to get reliable previews automatically.
How it works
LumeCMS is divided into the following elements:
- Storage: It's the abstraction used by LumeCMS to read and write data from different origins, like the file system, databases, APIs, etc.
- Documents: A document represents a page or an entity of your site. For example, the home page.
- Collections: It's a collection of documents with the same data structure. For example, the posts in a blog.
- Uploads: Uploads are folders where you can upload files like images, videos, PDFs, etc.
- Fields: A field represents a value type and the UI used to edit this
value. For example, the "text" field represents a text value and displays an
<input type="text">in the interface.
Configuration
LumeCMS is very similar to Lume in the way it's configured: Create a configuration file, import the LumeCMS main module, create an instance, configure the instance, and export it. For example:
import lumeCMS from "lume_cms/mod.ts";
import Kv from "lume_cms/src/storage/kv.ts";

// 1. Create the cms instance
const cms = lumeCMS({
  site: {
    name: "My awesome blog",
    url: "https://example.com",
  },
});

// 2. Create file system and a Kv storages
cms.storage("my_fs", "src");

cms.storage(
  "my_database",
  new Kv({
    kv: await Deno.openKv(),
  }),
);

// 3. Create a document to edit the homepage (index.md file)
cms.document("homepage", "my_fs:index.md", [
  "title: text",
  "description: textarea",
  "content: markdown",
]);

// 4. Create "posts" and "people" collections
// using my_fs and my_database storages
cms.collection("posts", "my_fs:posts/*.md", [
  "title: text",
  "tags: list",
  "content: markdown",
]);

cms.collection("people", "my_database:people", [
  "name: text",
  "birthdate: date",
  "bio: markdown",
]);

// 5. Configure a folder to upload files
cms.upload("my_uploads", "my_fs:uploads");

// 6. Export the cms configuration
export default cms;
As you can see, the configuration is very simple. Instead of strings like
title: text, it's also possible to define the fields using objects, useful if
you want to configure other options like label, description, or validation:
{
  name: "title",
  type: "text",
  label: "Please, write a title here",
  description: "A catchy title works better. Be creative!!",
  attributes: {
    required: true,
    placeholder: "Example: 'The best blog in the world'",
  }
}
Run the CMS
LumeCMS uses Hono under the hood to manage all routes and
serve static files. To run the CMS, get the Hono instance with cms.init() and
pass it to Deno.serve():
import cms from "./cms_config.ts";

// Init the CMS and return an Hono instance with the app
const app = cms.init();

// Run a local server with your CMS
Deno.serve(app.fetch);
Run this file to start the CMS and open the URL http://localhost:8000 in your
browser. You will see a page like this:
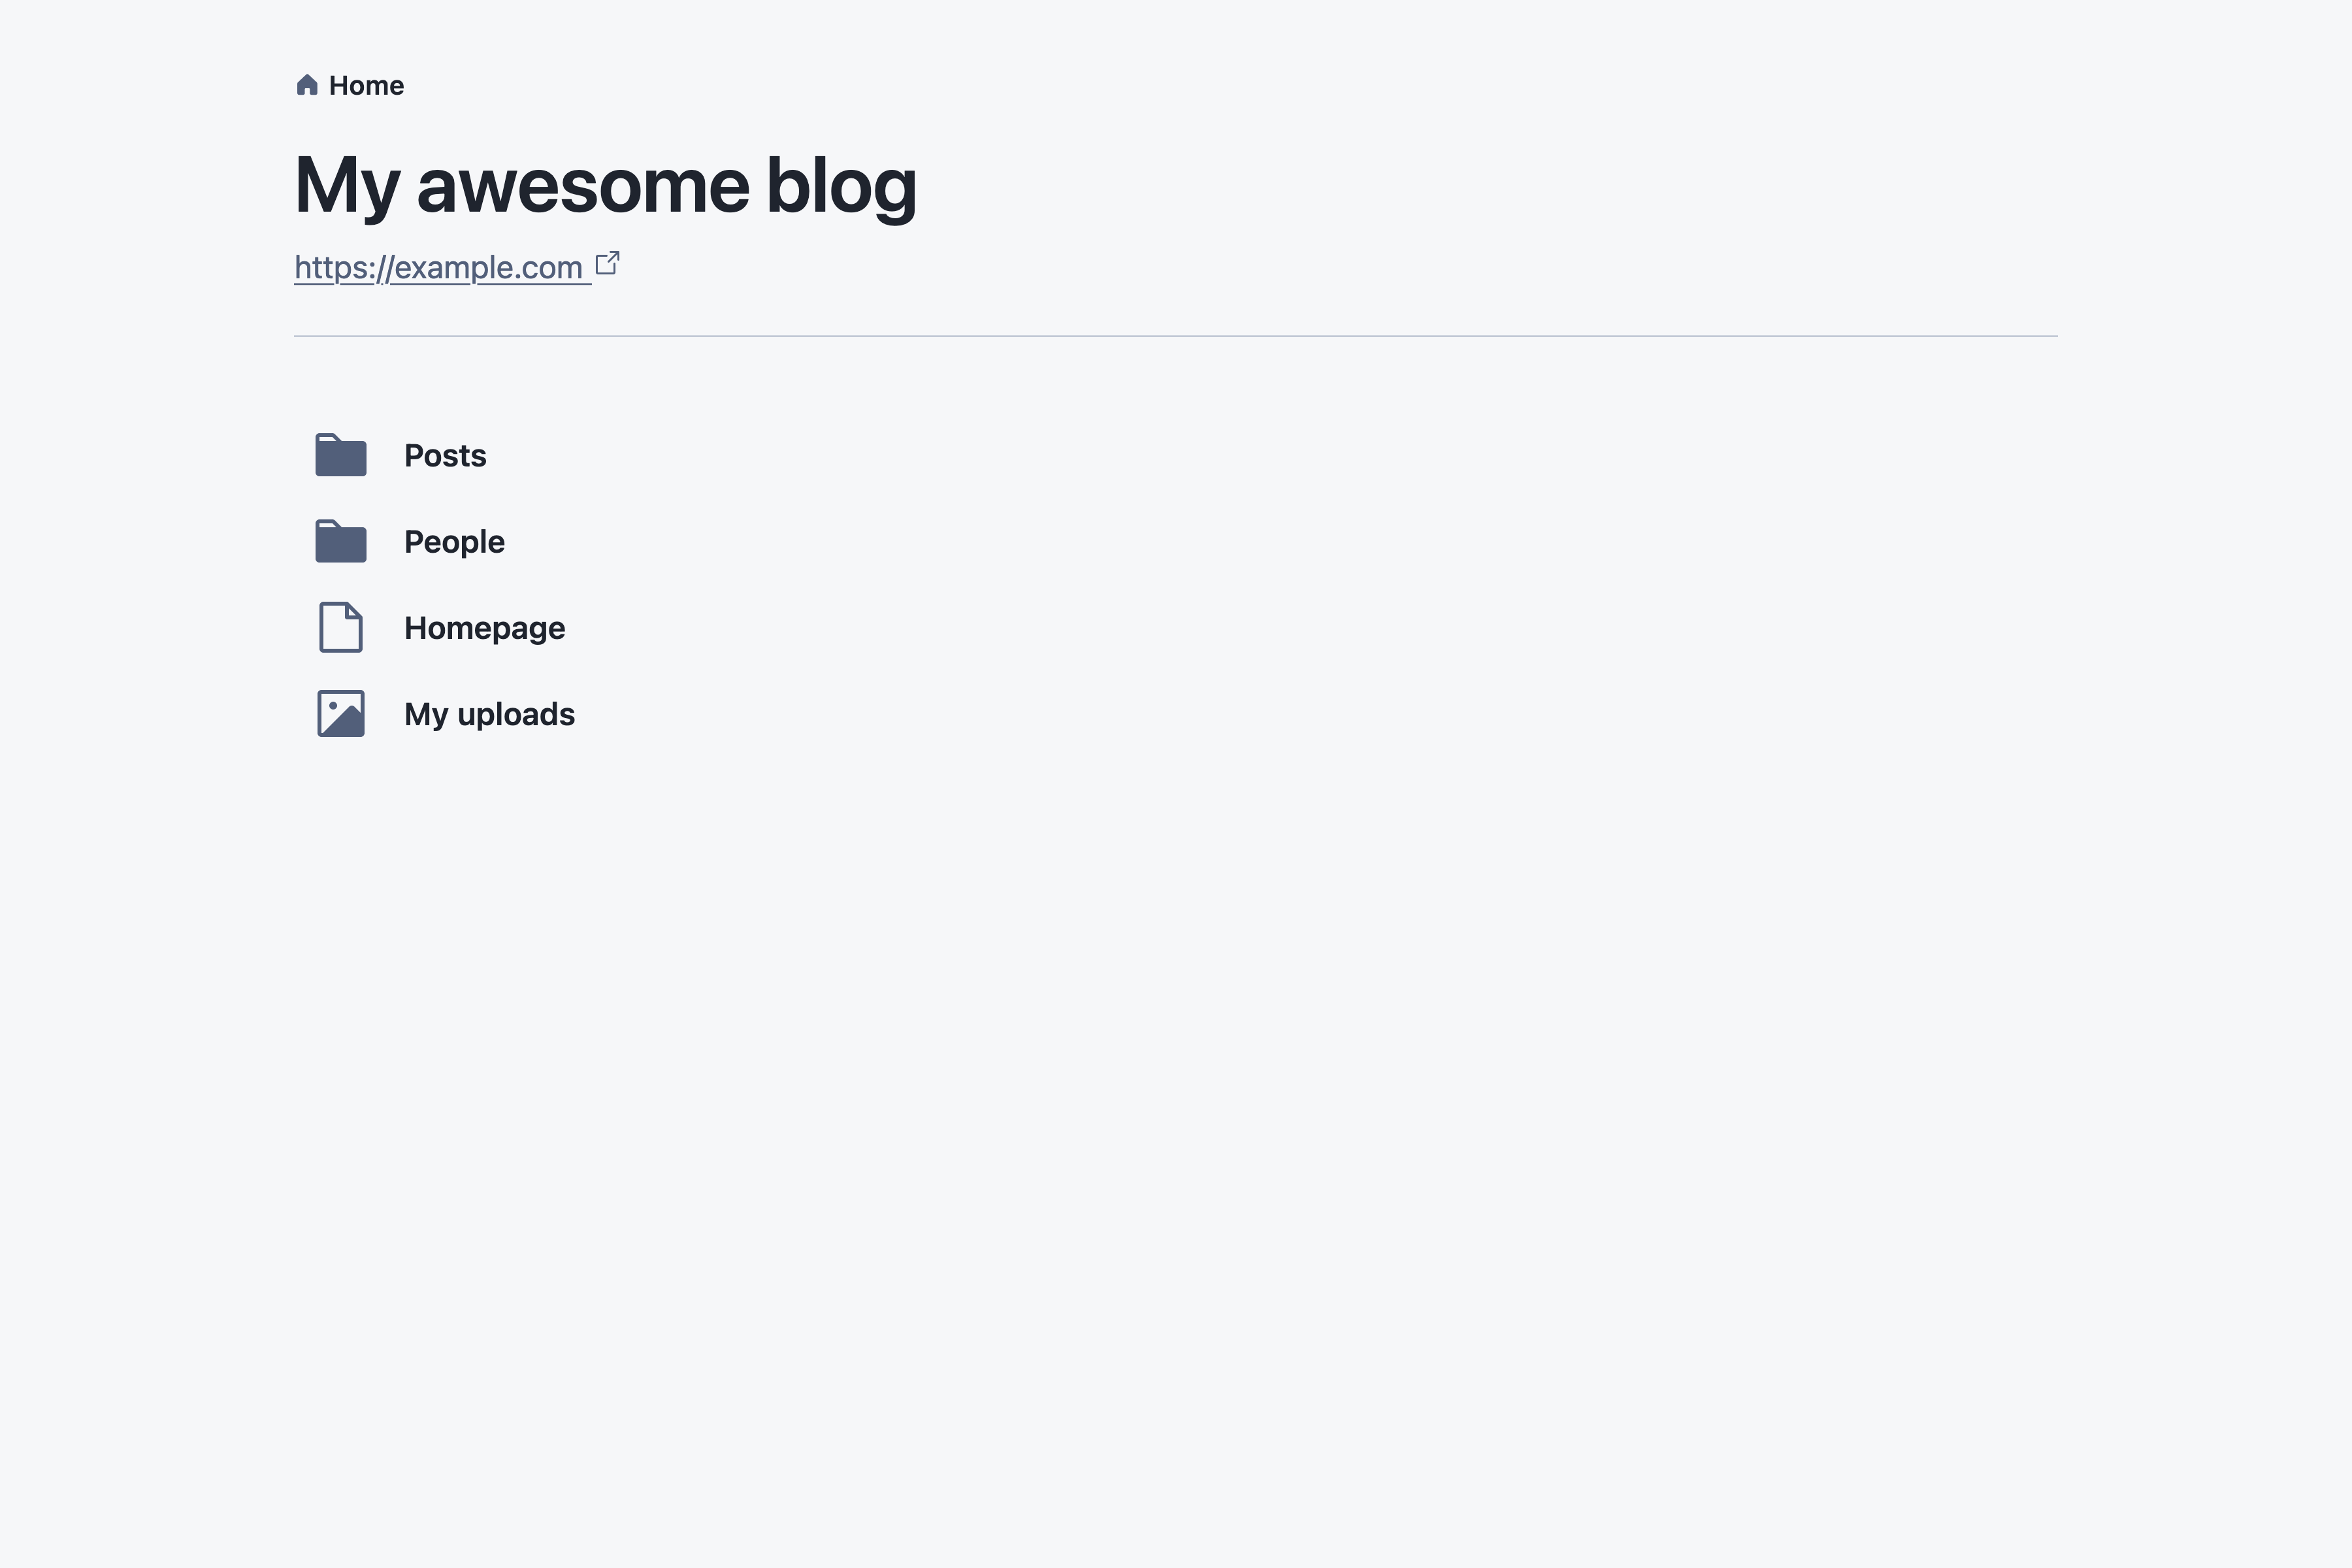
The posts and people collections, homepage document, and my_uploads
upload folder is available for editing!
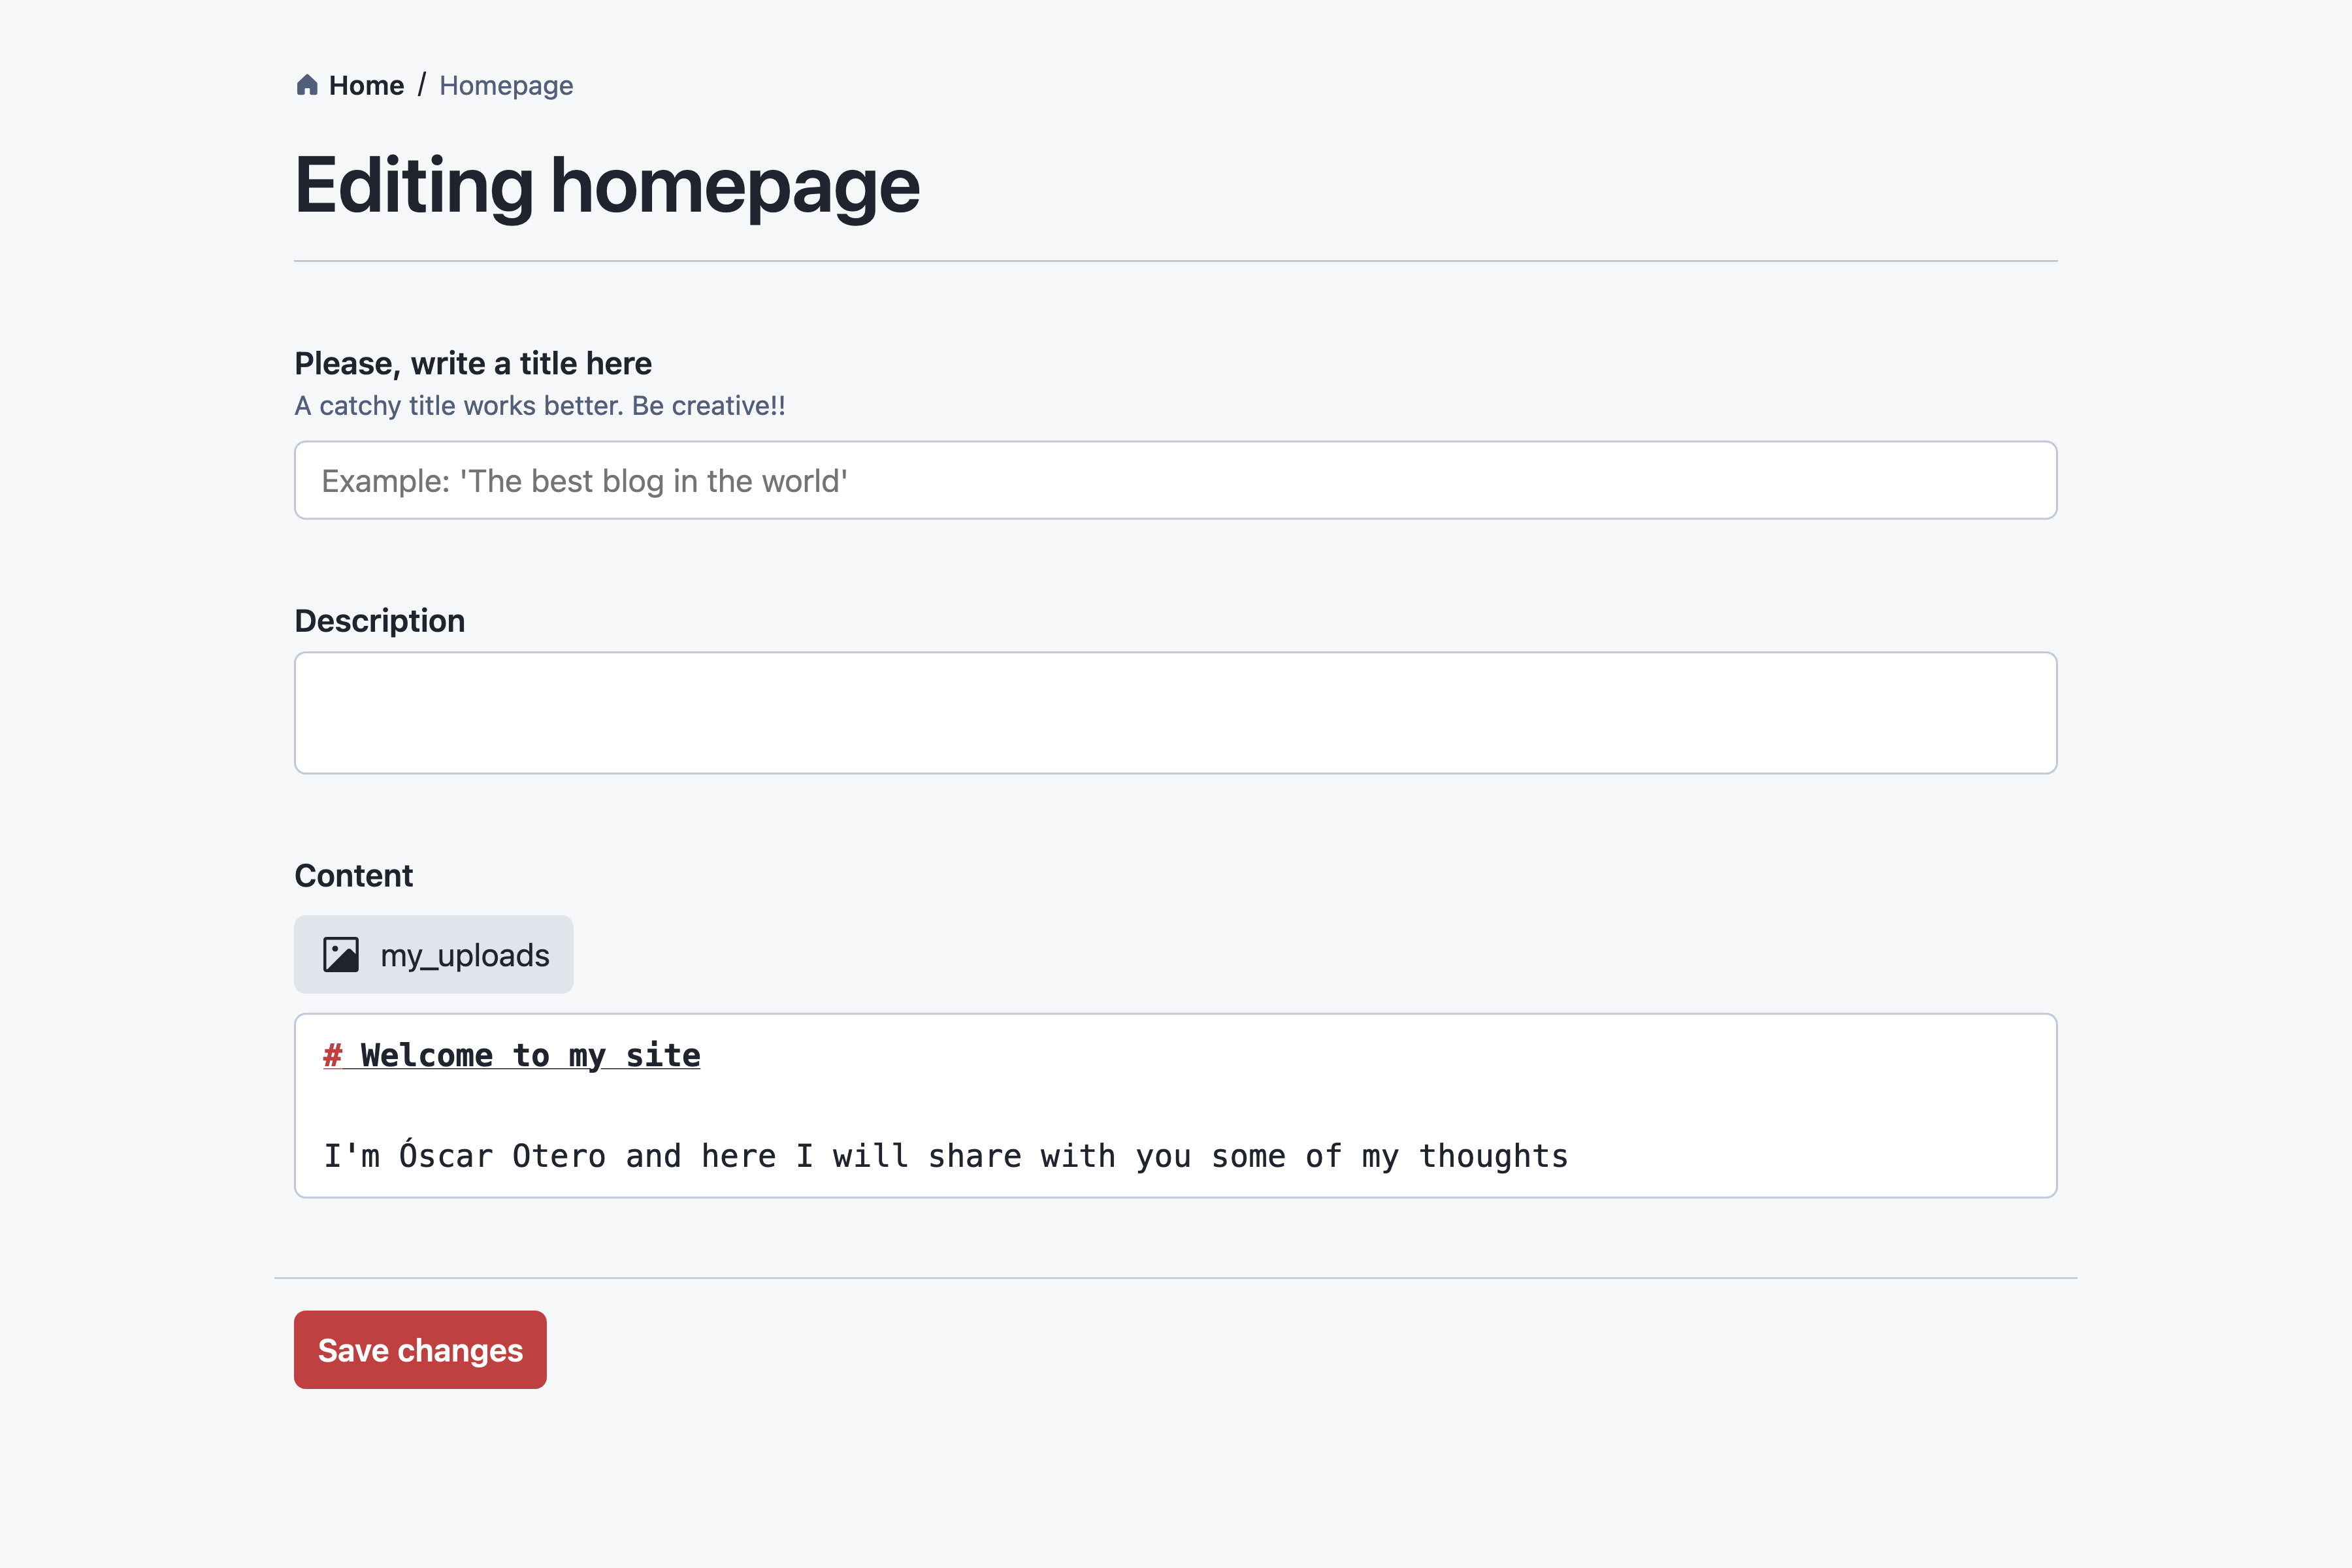
If you go into the Homepage you will see the fields to edit the content:
Lume integration
LumeCMS has an adapter for Lume SSG to automatically configure the site preview
while you edit it. This integration will be available in the next version of
Lume by running the command deno task lume cms, but it's also possible to
setup manually with the following code:
import lumeAdapter from "lume_cms/adapters/lume.ts";
import site from "./_config.ts";
import cms from "./_cms.ts";

// Return a Hono instance with the site + cms
const app = lumeAdapter({ site, cms });

// Run the server
Deno.serve(app.fetch);
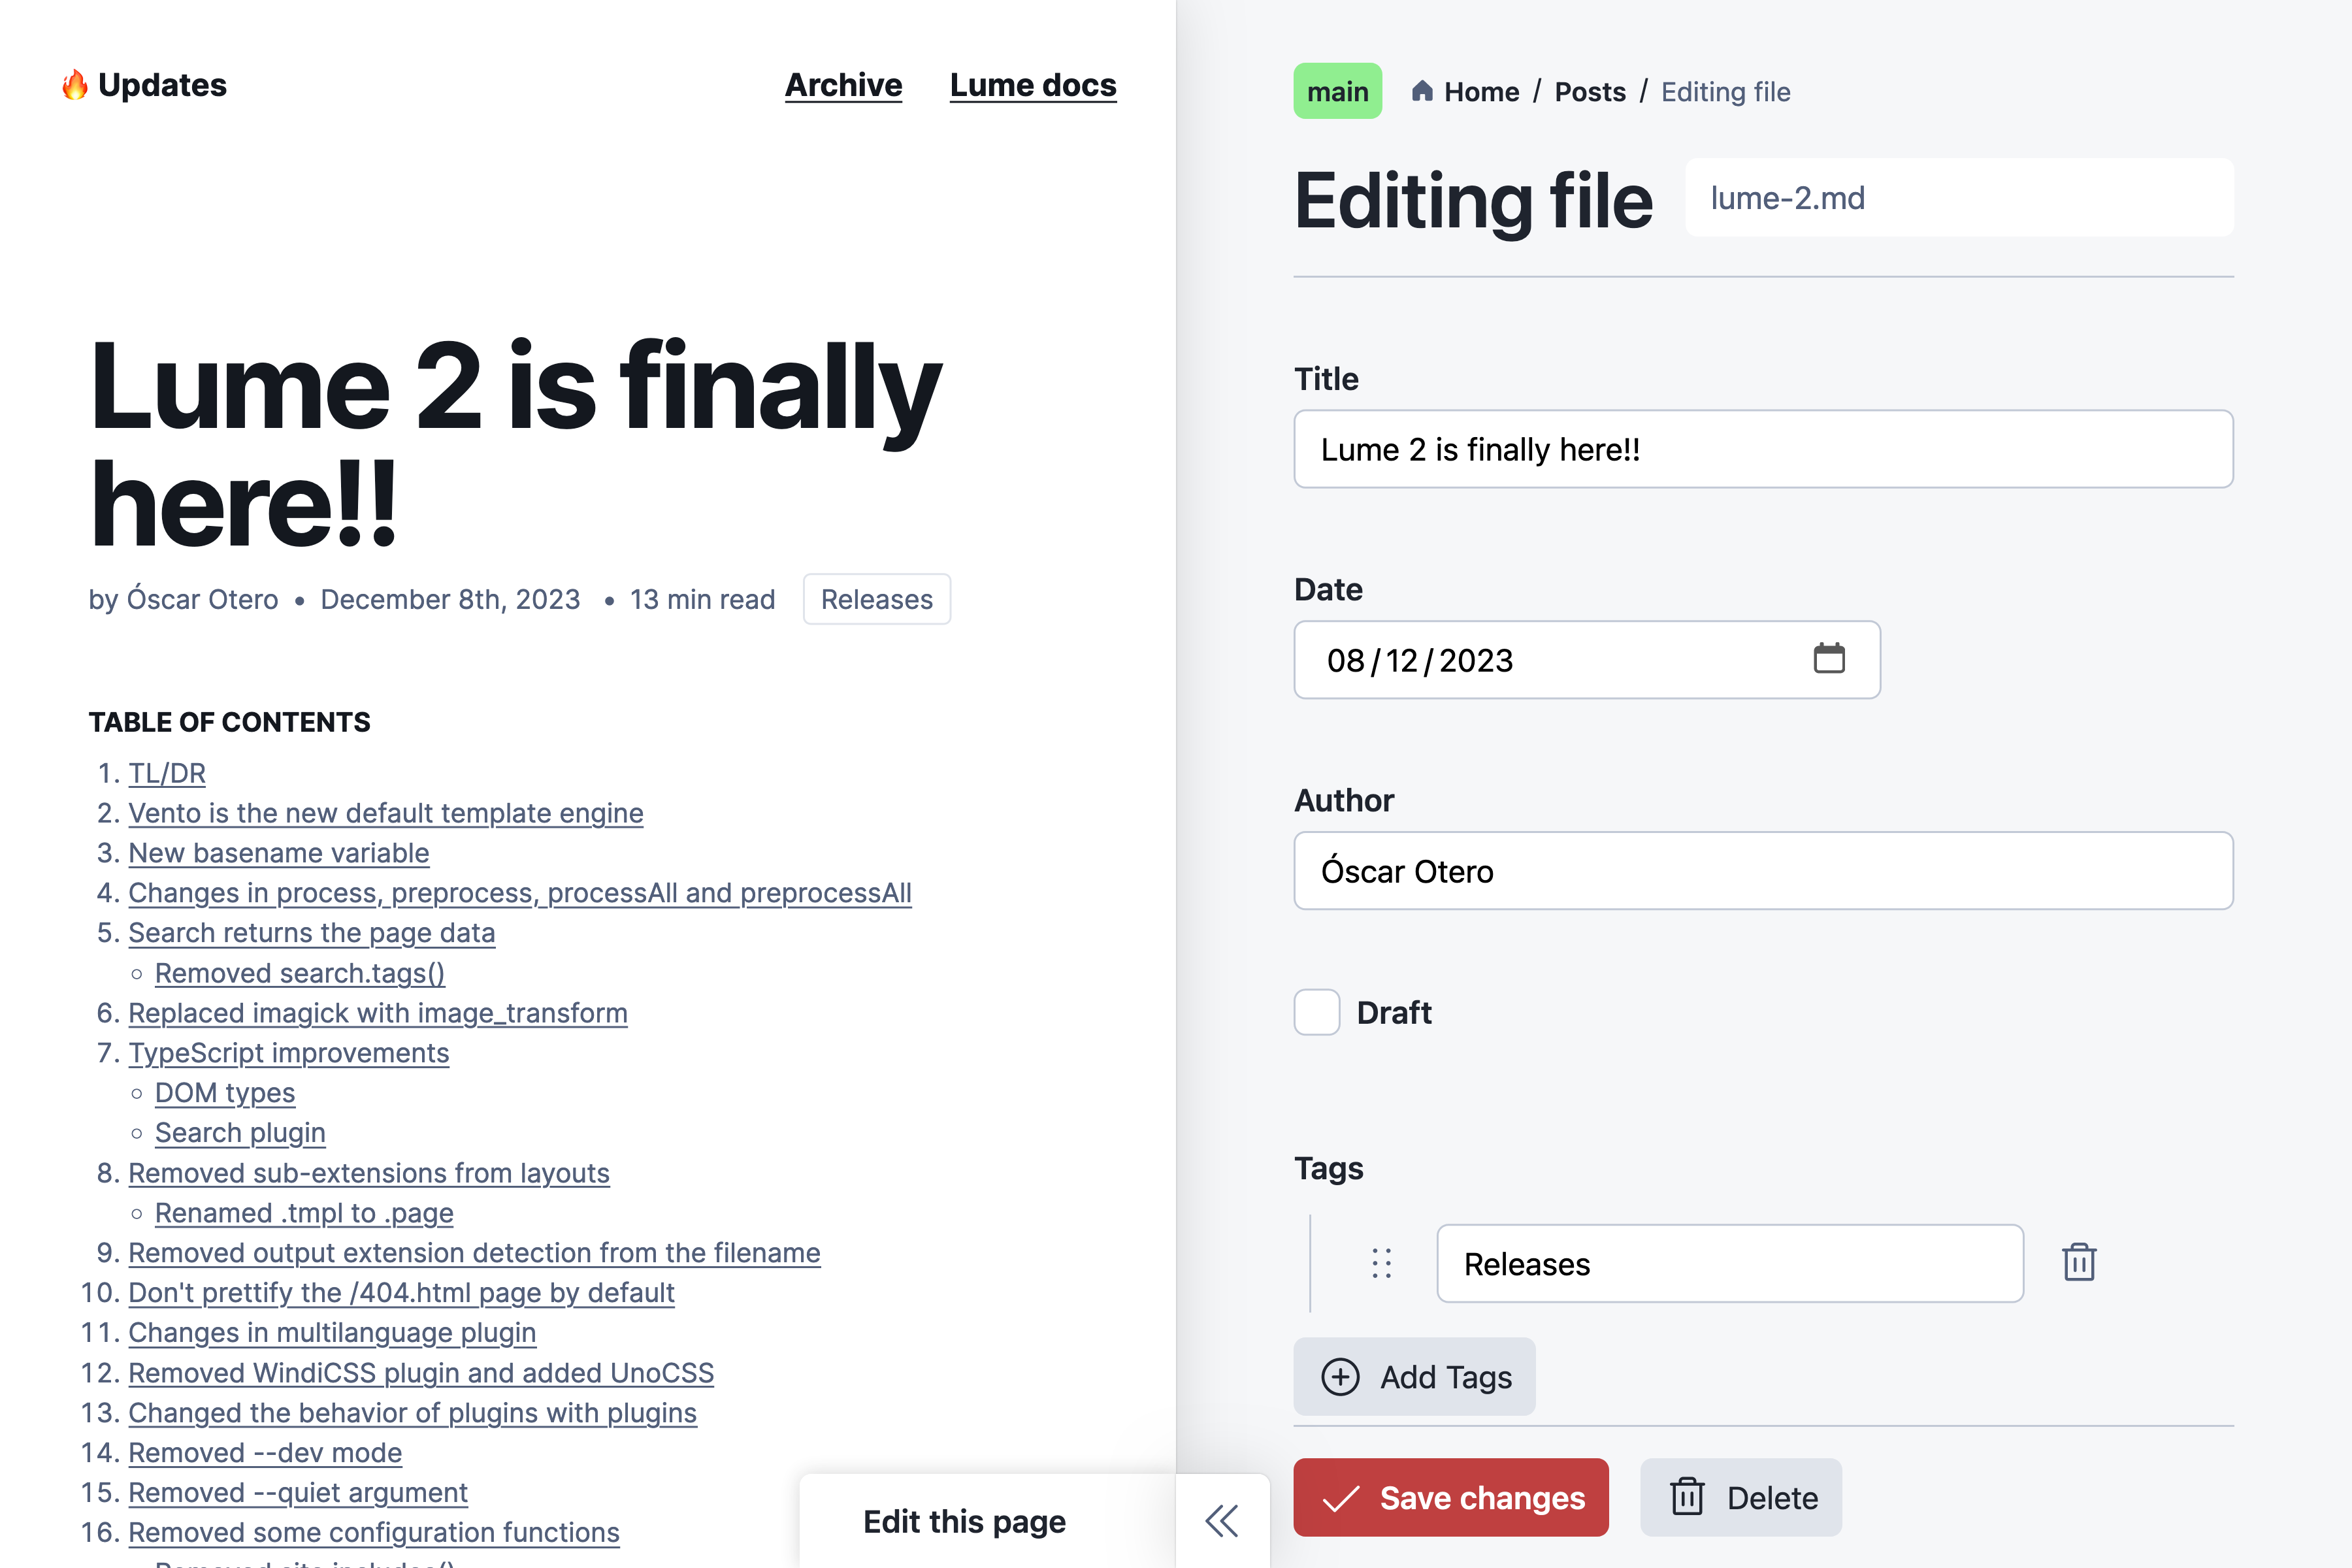
After connecting Lume and LumeCMS, you will be able to edit the page content in the CMS and preview the changes after saving:
You can test it in your computer
cloning this blog repository and running
deno task lume cms.
Let me know if you want to help create integrations for other frameworks like Eleventy, Hugo, etc.
Installation
LumeCMS will be available in Lume 2.1.0 with the command deno task lume cms.
If you want to test it now, upgrade Lume to the latest development version with
deno task lume upgrade --dev.
If you don't use Lume or don't want to upgrade, it's possible to import LumeCMS from https://cdn.jsdelivr.net/gh/lumeland/cms@v0.2.7/, so it's recommended to configure your import map as follows:
{
  "imports": {
    "lume_cms/": "https://cdn.jsdelivr.net/gh/lumeland/cms@v0.2.7/"
  }
}
Why don't use deno.land/x repository?
I've tried but LumeCMS needs access to some files like SVG icons and CSS code from the browser and deno.land/x repository returns CORS errors for these formats. A CDN like jsdelivr.com, allows both Deno and browser access, and it's just as fast.
Deployment
Deno Deploy
Due Deno Deploy cannot write files, it's not possible to provide a live-preview mode. But if you only need a UI to edit the site data, it's possible to use the GitHub storage method to send changes directly to the GitHub repository:
import lumeCms from "lume_cms/mod.ts";
import GitHub from "lume_cms/storage/github.ts";
import { Octokit } from "npm:octokit";

const cms = lumeCms();

// Register GitHub storage
cms.storage(
  "gh",
  new GitHub({
    client: new Octokit({ auth: Deno.env.get("GITHUB_TOKEN") }),
    owner: "oscarotero",
    repo: "test",
  }),
);

// Now you can create documents, collections, and uploads using the gh storage:
cms.collection("posts", "gh:posts", [
  "title: text",
  "tags: list",
  "draft: checkbox",
  "content: markdown",
]);

export default cms;
You can see a demo at lume-cms-demo.deno.dev and the code repository.
Hosting a full-featured CMS
To host a CMS including the live-preview feature, you need a hosting with Deno CLI installed. I'm planning to create a Docker image and document all the steps anytime soon.
Development
Note that LumeCMS is still in the early stages and bugs and changes are expected. Go to the GitHub repository if you want to see the code or help with the development.
Thank you!